My son is a genius... the kid can convince me to make anything. I would never go through this much trouble to make something for anyone other than him.
Back in July, he and I were cruising around as we normally do on Saturdays and he said, "Mommy, I've decided what I want to be for Halloween and it's going to take a long time to make so I wanted to tell you now."
Our conversation goes on and he tells me he wants to be a
Raving Rabbid. "A Raving Rabbid? How am I going to make that?" He replied, "You'll figure it out, I believe in you!"
Those were the words that got me, "I BELIEVE IN YOU!" I couldn't let him down and I didn't. I worked on it until the Saturday before Halloween.
I completed it and I must say that it is one of my finest accomplishments.
Let's note that I didn't start on it until late August: 1: because I am a slacker. 2: because I had no idea how the hell I was going to complete this task.
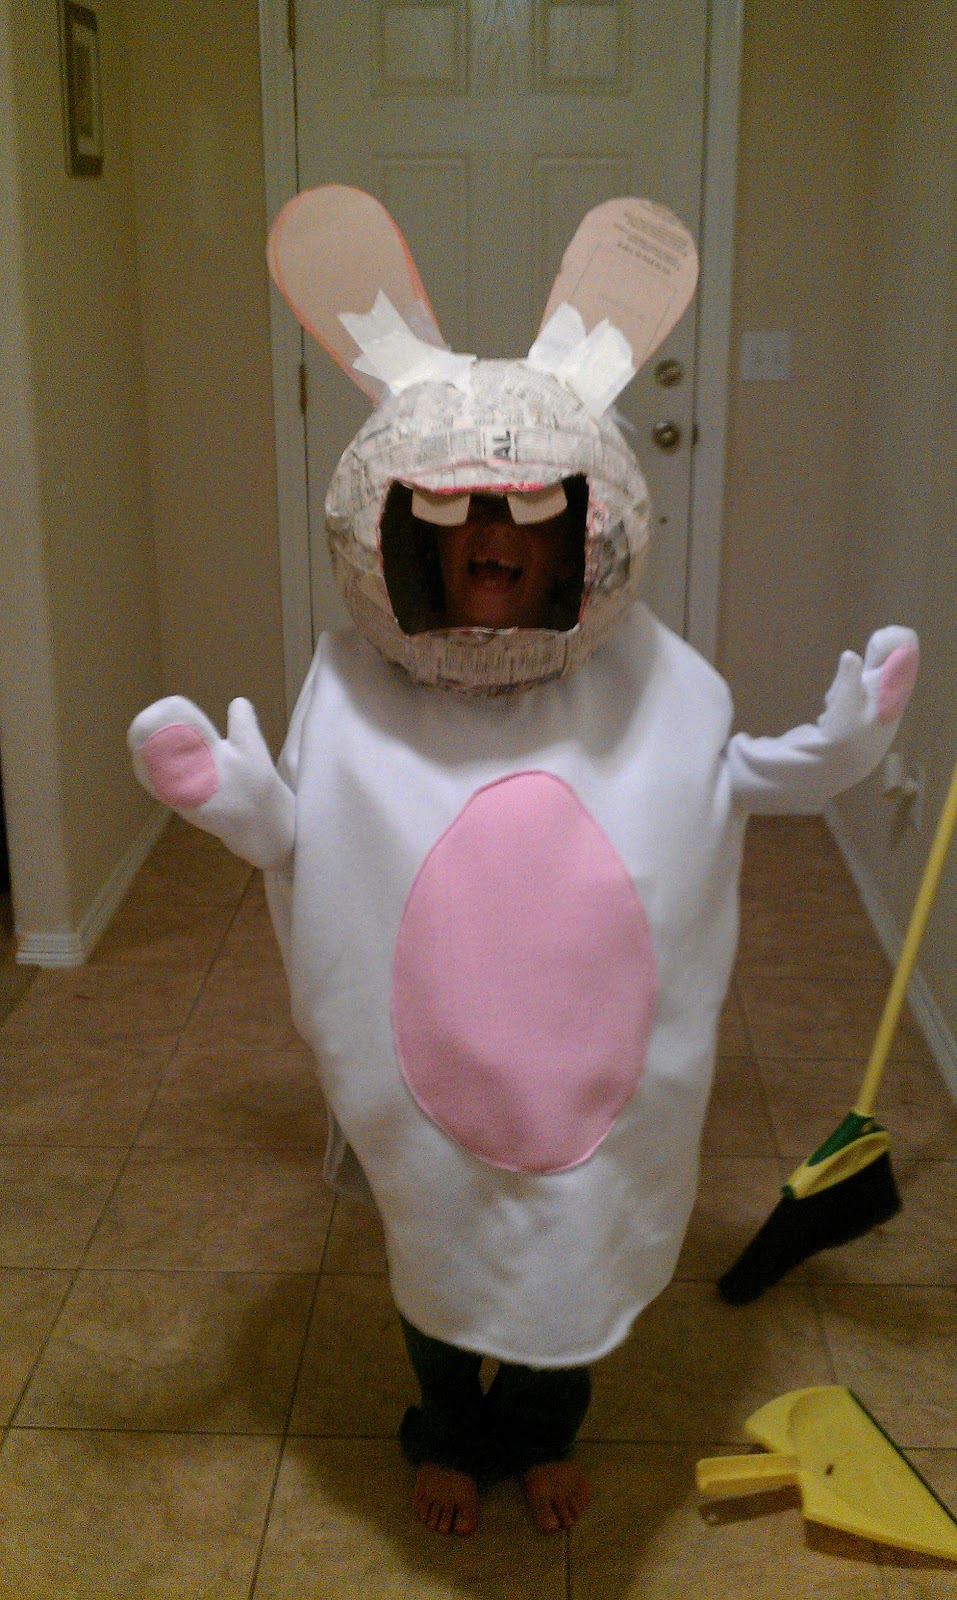
I new I was going to paper mache the head, because it seemed easier that way.
I started with one of those giant popper balloons that have a rubberband on it because they are round and not egg shaped. I used a flour and water mixture for glue and then cut the strips of newspaper to dip into it. It came out lumpy and not smooth like I wanted. :(
I cut ears and teeth out of a cereal box and attached them with masking tape.
Using a felt like material, I added a two layers to the body and didn't sew it closed so I could stuff it later.
It was longer than needed because I needed it that way so I could attach legs.
I measured out the size I needed for the legs.
(This is where the directions trail off for a while, obviously I was just trying to figure out what to do next)
Partially stuffed belly and detachable gloved arms.
When I was at the fabric store having a meltdown about the texture of my mask, an older lady told me to use liquid starch from the laundry section and follow the directions for paper mache. I did several layers with newspaper with liquid starch-- it came out perfectly smooth. (Thank you random lady who listened to my problems.)
At first I was going to spray paint the mask white, but I was worried about fumes so I only sprayed the ears and teeth white.
Once the spray paint dried, it was a different shade than the body, so I decided to cover the face with the same fabric using a spray adhesive. The front was perfect, but the back looked a bit like puzzle pieces or, if you prefer, Frankenstein.
The eyes are a bouncy ball from the dollar store that I cut in half, spray painted white and glued to the head.
My son asked for red eyes, so I painted them on with acrylic paints.
I added tulle to inside of the head for the mouth.
I stuffed the belly and attached the velcro on the back for closure. The bottom I left open so I could attach the legs.
Added lips.
At last minute the boychild decided that his Raving Rabbid needed to be from
this specific game.
So let me get this straight... he wants a costume for his costume? WOW! The words "I BELIEVE IN YOU" started to echo.
I used a faux leather to make the eye patch and belt, then I used a strip of red fabric for a bandana, whicht I glued together on the backside.
I cut a two pirate hat shapes out of a cardboard box, as well as small sides to secure it together.
I spray painted the eye patch black.
here is the paper mache pirate hat and the completed belt.
Once it dried, I spray painted it black and free handed the pirate rabbid and crossbones with white acrylic paint. I added a fabric tongue to the tulle.
You can see how large the head is in comparison to my kid.
I got lazy toward the end of this, and decided not to attach the legs to the body. I actually attached them with large safety pins to his jeans. The bottom of the feet were made of what I will is likely vinyl tablecloth material.
With the legs being detachable, bathroom emergencies were not a big deal and saved me a lot of additional time.
When he was trick or treatin', kids recognized him as a Rabbid and that made him very happy.
I received a ton of thank you's and hugs from a very grateful little boy.
xx
Tyna


